On Wednesday, I found the time to test the annotation based configuration of the Spring BlazeDS Integration. Because it isn’t as easy as I thought, I wrote this little guide with all necessary configurations. You can download the sample project here.
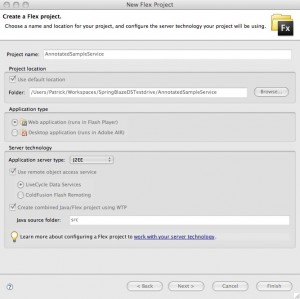
First you have to create a new Flex Project in Flex Builder, select as Application server type “J2EE” and use LiveCycle Data Service as Remoting. Click the button “Next”.

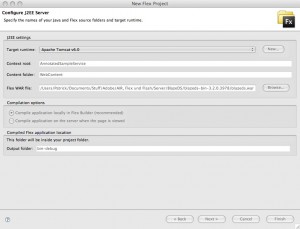
Now you have to select the BlazeDS WAR file and click the button “Finish”.

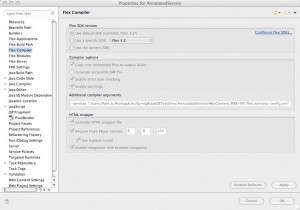
Under Project > Properties > Flex Compiler you have add -services and behind the path to the services-config.xml (Screenhot), like in all other BlazeDS oder LiveCycle DS Applications. During the compile process the compiler creates an Actionscript class with the information of this file. The services-config.xml can found under the WEB-INF/flex. This file contains the definition of the MessageBroker and references to the messaging-config.xml and the remoting-config.xml. In the remoting-config.xml, you can find the definitions of the RemoteObjects and in the messaging-config.xml all messaging configurations.

You can delete these two files because the RemoteObjects and Messaging will now defined in your Spring application. You must also delete the references to these files in the services-config.xml. The content of the services-config.xml should now look like this.
                false


                true
                4


			true
			5
			60000
			1
			200


                [BlazeDS]
                false
                false
                false
                false


                Endpoint.*
                Service.*
                Configuration


            false
Now you have to configurate the Dispatcher Servlet, which get the information from the Flex application. Normally, you can find the definition of the MessageBroker Servlet in the web.xml. The Spring BlazeDS integration defines the MessageBroker in applicationContext.xml and uses a Dispatcher Servlet to transfer the Flex request to the MessageBroker. So, you have to replace the Flex related configuration in the web.xml. The file should now look like this:
	AnnotatedService


		contextConfigLocation

			/WEB-INF/config/web-application-config.xml


		org.springframework.web.context.ContextLoaderListener


		dispatcherServlet
		org.springframework.web.servlet.DispatcherServlet
		1


    	dispatcherServlet
    	/messagebroker/*


		main.html
Now, you need a configuration file for the DispatcherServlet. Because I named the DispatcherServlet instance “dispatcherServlet”, I have to create a file with the name “dispatcherServlet-servlet.xml” in the folder WEB-INF.
The next step is to configurate the MessageBroker in applicationContext.xml. Till now, you can use also for not annotated configuration of Spring BlazeDS integration.
A annotated configuration needs some additional lines to scan the source for the spring annotations. The base-package specifies where Spring should start to search for annotations.
The applicationContext.xml should look like this:
The last step is to add the annotation in the Java class. You have to add the @Services, the @RemoteDestintion and the protocol you will use for the transfer above the class definition. When a method should be accessable via BlazeDS, you have to add above this method @RemoteInclude annotation otherwhise the @RemoteExclude annotation.
package test;

import org.springframework.flex.remoting.RemotingDestination;
import org.springframework.flex.remoting.RemotingExclude;
import org.springframework.flex.remoting.RemotingInclude;
import org.springframework.stereotype.Service;

@Service
@RemotingDestination(channels={"my-amf","my-secure-amf"})
public class SampleService {

	// accessable via BlazeDS
	@RemotingInclude
	public String getMessage(String name){
		return "Hello "+name;
	}

	// not accessable via BlazeDS
	@RemotingExclude
	public String getMessage2(String name){
		return "Hello "+name;
	}
}
The name of the RemoteObject is same as Java class name but with the first letter is a lowercase. In my example the name of the RemoteObject is “sampleService”.
I hope this guide helps setting up a Spring BlazeDS application using annotations.


